Saturday, December 22, 2012

12 Days of Christmas (Day 12 - 12 Handmade Thank You Cards)

We made it!  12 Days of gifts for 2 deserving teachers.  Today's gift in the original post was 12 apples.  I thought that was a little much.  Unless you knew they would need that many apples.  Instead, I started thinking about what they could need.  I had heard that teachers get very tired of all the apple-related things that they get.  That after about 1 or 2 years of teaching, they have all the coffee cups, and apple trinkets they can stand.  That is when I thought of apple thank you cards.  I know that all the teachers I have met, use thank you cards a lot and making them apple-themed would keep to the flavor of the gifts. Remember back to Day 1, I had purchased a whole pack of Grade School 12x12 scrapbook paper and used it to make the clipboard.  Now, I had a new use for it.
I was a little daunted by creating 24 handmade cards for someone else, so I kept putting it off.  I ended up staying up on Day 11 until 2 am (of Day 12) getting them done.  Some, I made 4 of - 2 for each teacher.    But, basically, I used the plain cream envelopes and card that I bought at JoAnn's and added the papers and ribbons to them to decorate them.  Here they are:


Here they are all bundled with ribbon and ready to give.
So, that's it!  All done!  I am glad to have done it.  I hope you all have enjoyed it and have a Merry Christmas and a Happy New Year!
Meagan

Friday, December 21, 2012

12 Days of Christmas (Day 11 - 11 pencils)

I have had such a great time getting all of these gifts ready for the teachers.  Taking something so useful and non-exciting and making it cute, interesting and fun.  Here we are on the 2nd to last day with something that every teacher uses - Pencils!
I got a 24 pack of the Ticonderoga - the best pencils.  I split them up and bundled 11 pencils for each teachers (and got to keep 2).  Again, you could get the cheap, Dollar Store variety, but I know that many times those pencils are not worth even sharpening.
I kept it very simple - wrapping them in red and white curling ribbon like I did the red pens on the 2nd day.  Making them look like a candy cane and attached extra curling ribbon and the tag, which reads:

For the 11th day of Christmas,
Some pencils I hope you'll need,
(school name) is so lucky
to have you, indeed!


So, only 1 day left.  The final reveal is coming up.  It is an extra special gift.  I spent quite a bit of time creating them.  
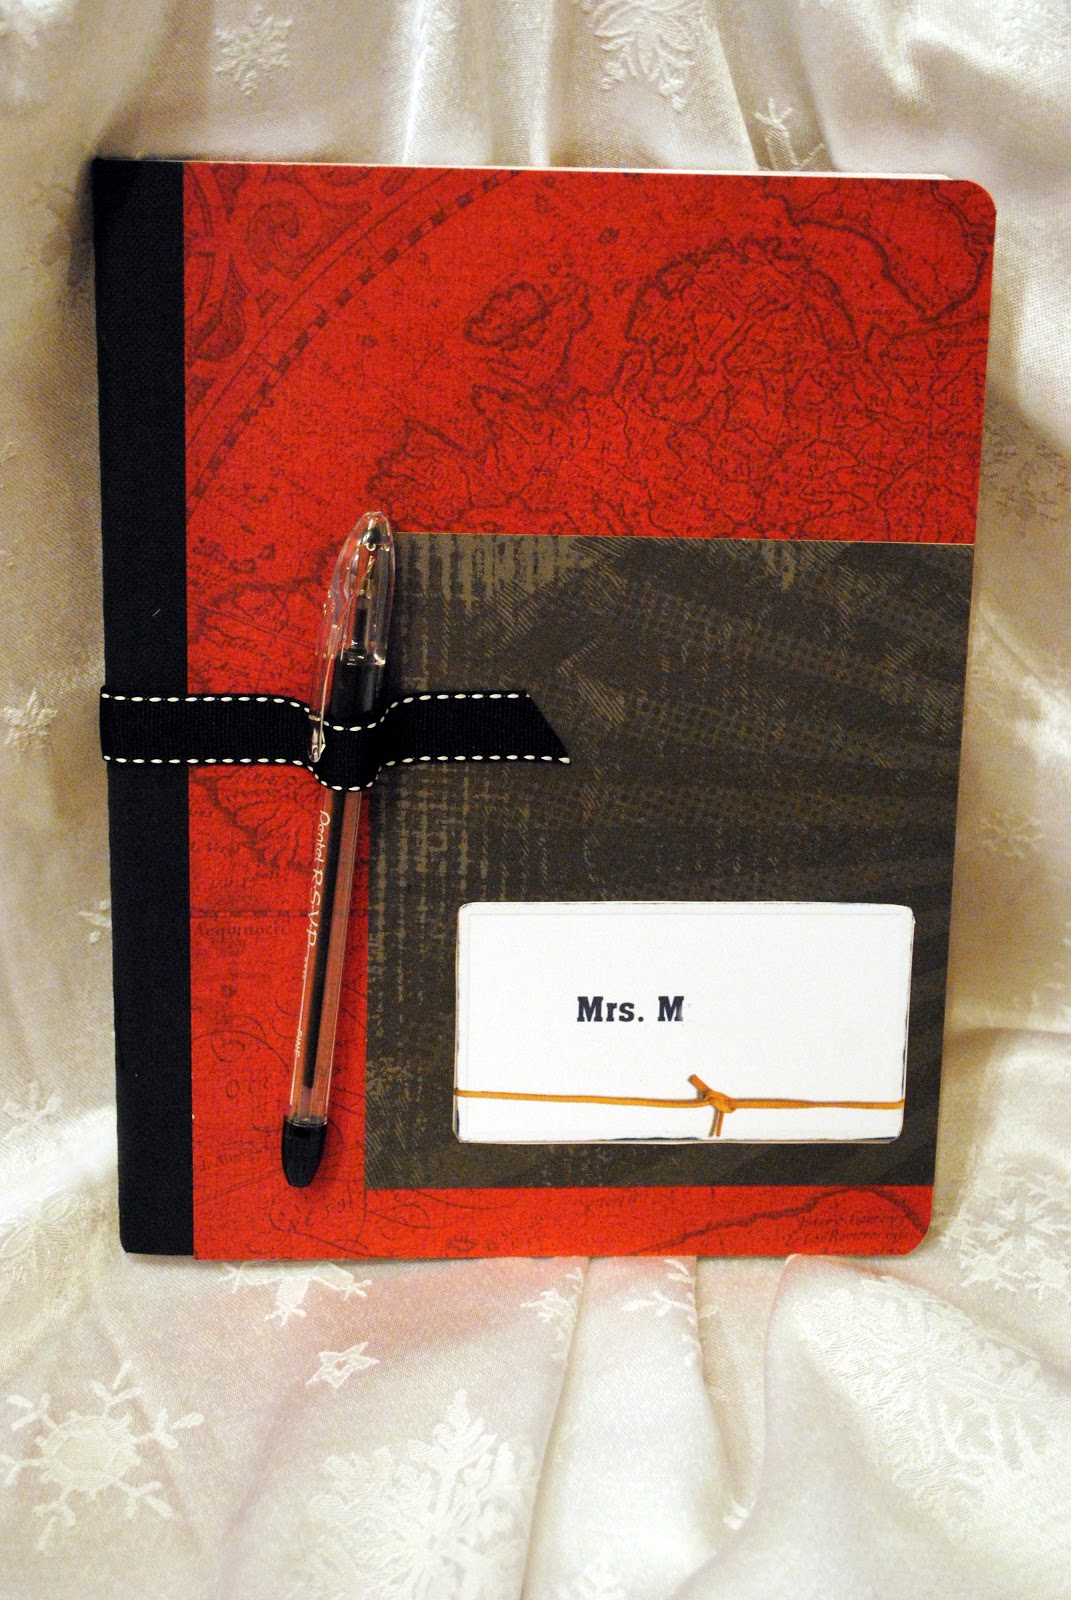
Another quick crafty item.  I wanted to share what I did for my 12 yo's teachers.  Now that he is in middle school, he has 6 teachers.  I couldn't do something like the 12 days for 6 teachers, and I didn't want to do something too "cute" (embarrassment is a factor for 7th grade boys).  I thought that something useful, easy to carry 6 of them, and inexpensive.  I got your basic Composition Books at Target for .94 each (plus 5% off using the Red Card).  If you picked up a bunch during the back to school sales, they were only .50 each.  Anyway, I decorated each one with papers appropriate for that teacher's subject, added ribbon with a loop for a pen and gift done!


For his science teacher

For his pre-calculus teacher

For his English Language Art teacher

For his Social Science/History teacher

For his World Language teacher

For his PE teacher
Be back tomorrow with the big reveal!
Merry Christmas
Meagan


Thursday, December 20, 2012

12 Days of Christmas (Day 10 - Magnets)

Just a quick one today.  I am trying to finish Day 12 right now, plus the gifts for my son's teachers (decorated notebooks).  It is a really easy one.  The gift is 10 magnets.  At first, I thought 10 magnets seemed a bit much, until I realized that white board magnets were exactly the right kind of gift.  I found 10 packs of white board magnets for the teachers.  They had their own small package that I quickly added curling ribbon to.
That's it.  Simple.  But useful.  Tomorrows will be useful as well.
Meagan

Wednesday, December 19, 2012

12 Days of Christmas (Day 9 - Candy Cane bow)

Hello all.  I have been busy trying to do all my last minute Christmas stuff done.  Have you done all of your wrapping, buying, creating, baking, etc?  So, sorry that this one was a little late, but I feel like I have so little time to get stuff done.

For Day 9, the gift is supposed to be 9 Candy Canes.  I think the original post used full sized candy canes, but I again, I changed it to be mini candy canes.  I figured they could use 9 minis a little easier.

The Poem reads:
For the 9th day of Christmas,
9 canes of red and white . . .
Guess who my favorite teacher is?
If you guessed 'YOU', you're right!

When trying to decide how to package them, I first thought of just adding them into a clear bag like the paper clips.  Then, after playing with them, I created this - a bow of candy canes:
 First, line all canes up going the same direction and hold them by the bottoms.  Then, tie a ribbon tight around the excess packaging.  Twist the canes until you have a circle.  Add more curling ribbon.  Some, I ties up through the canes to position them better.  After curling the ribbon, simply add the tag and bow to finish.
Only 3 more to go and Christmas is quickly approaching.
Have a great night
Meagan

Tuesday, December 18, 2012

12 Days of Christmas (Day 8 - gum)

My countdown is almost complete.  Today is Day 8 of the 12 Days of Christmas for a teacher.  Today's gift is a pack (8 pieces) of gum.  Like I had mentioned yesterday, it was difficult to find gum in a smaller pack, so you may need to adjust what number it falls on based on what you find.  I found a double pack (2 complete packages) of 8 pieces for $1 of Eclipse gum.    Because the gum is in a basic square shape, I realized that it would be fun to create a new cover for it.  Really easy, too.

Here is today's poem:
For the 8th day of Christmas,
I've bought you chewing gum.
It feels like Christmas break
is never going to come!

 First, measure your gum pack.  I chose a simple solid red cardstock.  I made it the exact width of the package and a little bigger (1/4" - 1/2") all the way around.  Create fold lines using a bone folder or other blunt pointed onject (I used a pen cap).  I made all 4 lines first and then pre-folded them.  I measured the front and 2 small sides to be the size of the package, but added the extra 1/2" to the back so that it creates an overlap.

 For fun, I also cut out the little half circles that are part of the Eclipse package.  This makes it easier to remove the gum pack.

 I added a little bit of adhesive to the back of the package to keep it in it's new sleeve.  Then, place gum packaging to the adhesive.

After you have folded the package around the package, add more adhesive to the part of the overlap and fold the flap over to seal.
Then, add any ribbon and embellishment  You could decorate this package, but I left it basic. I wrapped the curling ribbon around with the tag.

It looks like a cute package now, instead of "just" a package of gum.  It took less than 10 minutes to do the entire thing, too!

Monday, December 17, 2012

12 Days of Christmas (Day 7 - paperclips)

Hello again!  I hope you had a great weekend.  I had a fabulous weekend with my family.
I wanted to speak first about what happened last Friday.  We were all shocked and horrified by the events that happened on December 14th, at Sandy Hook Elementary in CT.  I was in the middle of enjoying a holiday cookie exchange with my MOM'S Club friends when I heard about it.  As a mom with children the same ages as those that were taken from their families that day, I cannot tell you the sheer terror that I felt for those that are lost and for those that lost their little angels that day.  I could barely watch the news for days.  Here it was less than 2 weeks before Christmas.  I cannot even imagine.  I hope they find peace and some consolation.
With all of that happened, I find that it is even more important than ever to hug your family & friends, spend time together, and enjoy every moment that you have with them.  We gathered together with my family to do our annual cookie exchange and gathering.  I was so glad to take time from other activities to spend it with them.

So, I promised that today's post would be an easy one, and it is.  Today's poem reads:
For the 7th day of Christmas,
here are 7 paperclips,
multiplied by 10,
Hope you're enjoying this
'cause tomorrow, I'll do it again!

The original post had the paperclips listed on Day 8 and gum as day 7.  I did not find gum in a 7 pack.  In fact, it was rather difficult to find fum in a small pack at all.  At my grocery store, they are were 15 packs.  I ended up finding a double 8-pack of Eclipse gum at the Dollar Tree.  So, I shifted the paperclips to 7.  The paperclips could have been basic silver ones and they would have been even cheaper, but I decided to go with the nicer red plastic coated ones.  I thought they looked much more festive.  I kept the extra 30, out of the 100 pack of paperclips.

I bagged up 70 paperclips in a clear candy bag that I had and tied it up with curling ribbon, attaching the tag to the top.  Bam!  Simple, right??

We are getting closer to the final project!  Be back tomorrow

Friday, December 14, 2012

12 Days of Christmas (Day 6 - Snowman Hot Cocoa holder)

Hello, out there in Digi-land.  We have reached the half-way point of our 12 Days of Christmas for a teacher.  I am excited to bring you today's gift as it is extra special.  Today, you would be giving your teacher 6 packets of Hot Cocoa with marshmallows.  Again, I 'could' have just bagged it up and added a bow - but where would the fun be in that!?!  Here is what I came up with


Now, the poem reads:
For the 6th day of Christmas,
cold hands, face and toes,
warm up with these 6 packs
of cocoa and marshmallows.


I found this cute idea on Pinterest (where else ;) ) for making up little gifts of Hot Cocoa.  The original idea came from Split Coast Stampers which is a site for stampers.  They used more stamping supplies.  They did theirs to be a whole gift with cocoa, marshmallows, candy cane, etc.  I simplified mine a little more.  Here is supplies that you need:

6 packets of cocoa and marshmallow
8.5"x11" white card stock
Strip of red card stock (about 3/4" x 11")
large 1" googlie eyes (but you could draw them on with black instead)
large 1 1/2" red pom poms
holiday ribbon
orange marker
black marker/Sharpie
pink ink pad (I used my chalk pad)
sponge dauber

ruler
pencil
scissors
adhesive (I used white glue & scrapbook tape)


The most ironic thing about this list is that I only had to buy the red pom poms.  I actually had everything else.

Step 1 - determine the size that you need your snowman to be.  It needs to be big enough for your hot cocoa and marshmallows.  I measured my white paper with lines at 2" from each side and 4" from the top and bottom.
 Step 2 - Cut the lines on the side and then fold at the lines.

Step 3 - Turn it back to the front and daub the pink chalk about 1 1/2" down and just at either side of the front.  These are his cheeks.  If you only have regular pink ink, you can use that.  I just happen to have a chalk pad and this dauber, so this is what I used.  
Step 4 - Glue eyes and draw nose and mouth.  Using white glue, add the eyes near the cheeks.  I hand drew the orange "carrot" nose and the black squiggling mouth.

Step 5 - Glue Pom Poms onto the red strip and leave to dry.

Step 6 - add sticky tape to the flaps to put box together.

Step 7 - Using your adhesive/scrapbook tape, attach his ear muffs
Step 8 - Add his scarf.  I used the scrapbook adhesive all along the bottom of the box and then ran the ribbon along it.  Lastly, I tied off the "scarf" in a simple knot at the front.
 Step 9 - Add cocoa and marshmallow and share :)
*a note, for the marshmallows, I used a ziplock bag and added as many mm as would fit on the side of the cocoa.

I think these are so cute, I wanna make some for everyone.
Of course, if any of these are "too much" for you, you could just do them simply and wrap them with ribbon.
Tomorrow's will be simple.
Meagan